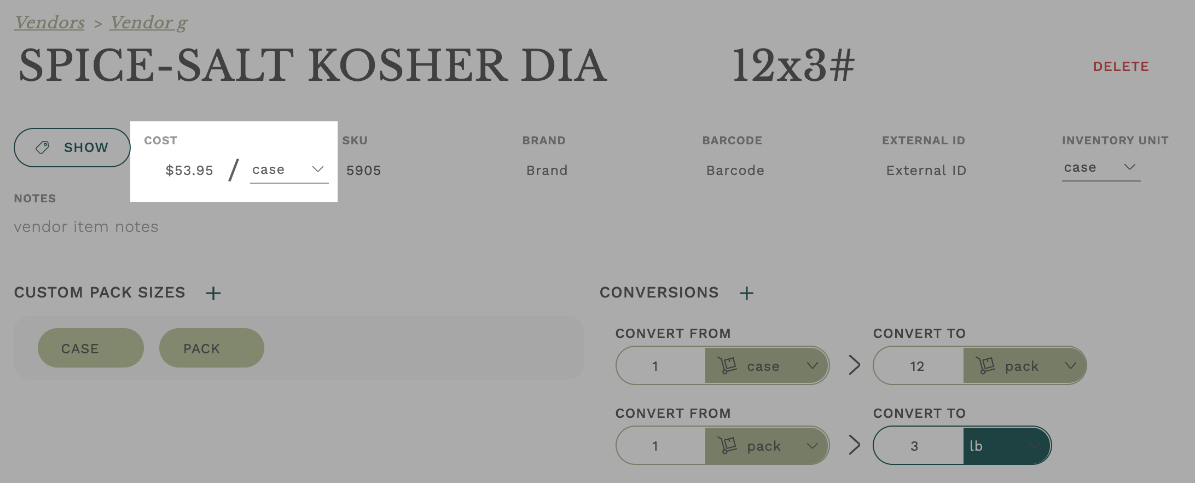
Vendor Cost Unit
From this article, we know that a Vendor Cost Unit (highlighted in the image below) is very important as it tells Galley how you order the item from the Vendor, and at what price. In this example, the Vendor item is purchased by the "case" and one "case" costs "$53.95".
Pack Size
The goal of conversions for a Vendor item is to translate the Cost Unit into something that can be used as an Ingredient. You may think of this conversion as the Pack Size.

While a vendor item's conversion usually ends with a standard unit, it may also contain custom units from an Ingredient that is linked to the given vendor item.
The conversion below is between two custom units, case and #10 can.
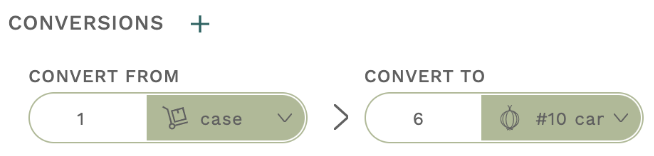 Notice how there is a different icon next to "case" than there is next to "#10 can". The box and dolly icon next to "case" signifies that "case" is a custom unit associated with a vendor item. There is an onion icon next to "#10 can". The onion icon signifies a custom unit associated with an ingredient.
Therefore, we know that "#10 can" was created as a custom unit for the Ingredient that is linked to this Vendor item. Ingredient custom units can be used by ALL Vendor items that are linked to a given ingredient.
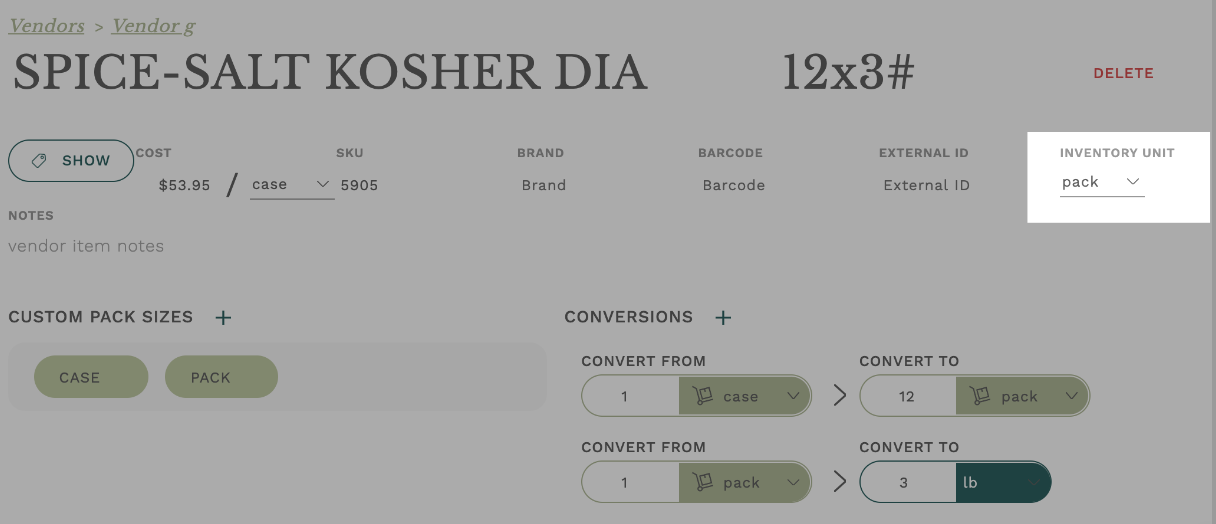
Inventory Unit
A Vendor item's Inventory unit (highlighted in the image below) is the unit that is initially suggested when taking a cycle count. This value will be set to the Cost Unit by default, however, if you measure the inventory of an item differently than how you purchase the item, you can change the inventory unit to reflect that. Be sure that the inventory unit has a conversion to the cost unit, otherwise, Galley will not know how much of the item you have on hand.
Conclusion
Setting up Vendor Item Units and Conversions allows Galley to understand how your items are purchased from Vendors, how the items are received, and how they are used in your kitchen.