How to create a Production Plan from the Menu Plan
Streamline your planning by following this simple guide
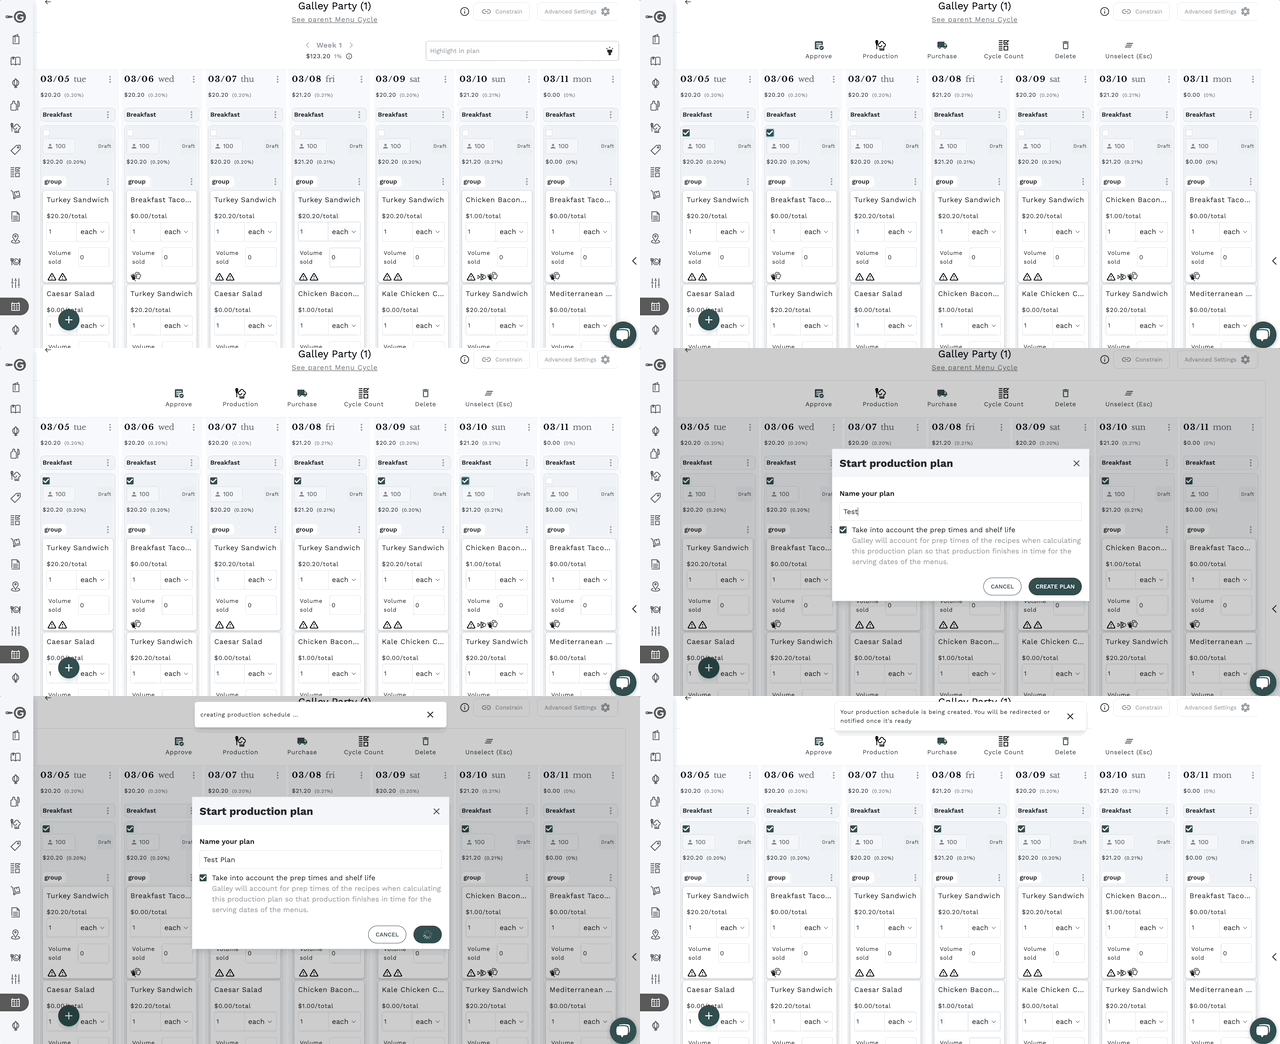
To create a production plan from a menu plan, navigate to your menu plan, select one or multiple menu events, and click on the Production Plan icon on the advanced menu right above the calendar view.
The system will prompt you with a dialogue box titled "Start Production Plan". Here, you can name your schedule, mark if you want Galley to calculate and optimize the schedule by checking the box, and click to proceed.
If you check the box, Galley will optimize your schedule based on recipe dependencies, prep time, shelf life, serving date, working hours, and days.
If you choose to uncheck the optimization & scheduling box, Galley assumes you will produce each menu on its serving date. Therefore, it will only scale recipes and batch equivalent recipes together, but it will not optimize the schedule.

If you want to know more about how the Production Planner logic functions, click here.
Once clicking 'Proceed', Galley will confirm the plan is being optimized and you will be taken to it when it's created. The process of creating the production plan in the background can take a few seconds or even a minute depending on the number of menus and recipes being processed. It is ok to navigate away at this time and return to the production plan catalog page in the future to resume.
Assuming you specified that Galley should calculate and optimize your schedule, it will appear with the status "Processing."

That means Galley is validating if the required data is correct, and If so, it will run the schedule calculation and optimization. Once processing is complete, the schedule will appear as 'Draft', and you can see the result by clicking the 'Actions' dropdown, then 'Review'.
